For many years, we struggled with getting our shared calendars and meeting rooms to work like we wanted them to in the Outlook 365 environment. Recently, we came up with a solution that we like and I’m documenting it here for two reasons: (1) to share the information with others, and (2) as a repository for the Byzantine steps needed to accomplish the goals of our calendaring solution, which are:
- We wanted a centralized “Shared Calendar” where all of our employees could place information about when they will be out of the office, travelling, or having a significant (client) meeting.
- While we wanted this shared calendar, we did not want people to have to enter information twice (once on their personal calendar, the again on the shared calendar).
- We wanted to be able to quickly see the status of conference rooms from a calendar view (not within the scheduling tool).
The first step was to set up a “SharedCalendar” that we could use to reflect what we wanted the other members of our team to see. With this in place (and using an initialing system for the subject lines of the meetings), we can get a quick look at what is happening across our company. Of course, you could do something for a specific team as well (e.g. “DevCalendar”). The result of looking at this calendar is:

Unfortunately, actually achieving this requires much more than just setting up a room for SharedCalendar. Here come the steps…
In the Microsoft 365 Admin Center (“M3AC”), click “••• Show all” at the main menu:

This will reveal an option for Resources, that looks like:

Under here, add a resource for whatever you’d like to call your shared calendar, and assign it the Resource type of “Room”.
Now, whenever you want to include anything on the SharedCalendar, you just invite the SharedCalendar to that meeting. Unfortunately, there are problems with this:
By default, rooms do not let you “double book” them. In this case, our “room” is just a virtual shared calendar, so we want to be able to double book it. This requires a PowerShell command:
Set-CalendarProcessing -Identity sharedcalendar@christopherai.com -AllowConflicts $True
If you need help with PowerShell, please see https://docs.microsoft.com/en-us/powershell/
So, now, multiple people can book meetings on the SharedCalendar, but when you look at the SharedCalendar in Outlook, it will only show free/busy information. Next step is to show the details in the calendar view. To accomplish this, you will need to name yourself as an owner of the mailbox associated with this resource. First, select the resource in the “Rooms & equipment” list of M3AC, then choose “Edit Exchange Settings.”

Once in there, you will need to select “mailbox delegation” then add yourself to the “Full Access” permission:

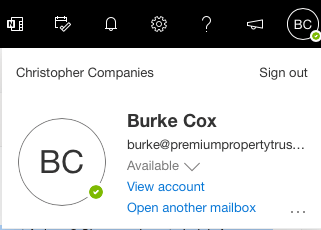
Now, off to the next step of showing more information, log into your Outlook 365 account online and click on the avatar area on the top right to reveal a menu:
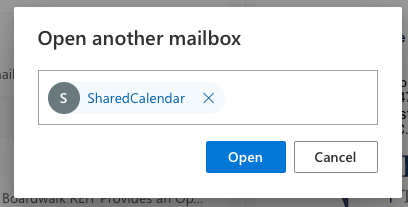
Under this window, select “Open another mailbox”… and open the SharedCalendar item mailbox.
If all permissions are set up correctly, it will open and you can then go select the “cog” icon on the top right, which will show the simple settings view. At the bottom, click “View all Outlook settings”.

In the “all Outlook settings” view, select Calendar | Shared Calendars…which should look like this:
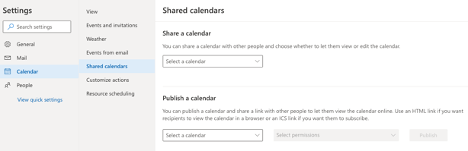
In the top section “Share a calendar” select Calendar from the drop-down. Change the default setting for “People in my organization” from “Can view when I’m busy” to either “Can view titles and locations” or “Can view all details” depending on how much you’d like to share. Of course if you are doing this at team level, you don’t have to use “People in my organization”; you could simply choose a team, or team members individually.

Unfortunately, we are not through yet, because when accepting a calendar invite, the Room resource modifies the subject by deleting it and replacing it with the organizer name. This requires another PowerShell command to resolve:
Set-CalendarProcessing -Identity sharedcalendar@christopherai.com -DeleteSubject $False -AddOrganizerToSubject $False
This gets us there, finally. For the meeting rooms, you’ll need to go through the same exercise, creating them (but skipping the step for allowing conflicts). Go through the visibility exercise by opening their mailboxes, and prevent them from deleting the subject and adding the organizer to it via PowerShell.
For our company we named the physical meeting rooms starting with an “@” symbol (e.g. “@ConferenceRoom”).
So, by simply who I invite I can have multiple outcomes:
• Inviting SharedCalendar, puts the meeting on my personal calendar and the SharedCalendar.
• Inviting @ConferenceRoom, attempts to book the meeting in the ConferenceRoom, but will fail if it is in use.
• Inviting both SharedCalendar and @ConferenceRoom, books the room and also puts it on the SharedCalendar for others to be aware of.
We have been using this system for several months now. With it, I can see several views: My calendar mixed with the shared calendar:

And a quick look at all the conference rooms:

You will note that on many of these, you see the organizer in the subject line. That’s just an artifact of me not running the PowerShell script to prevent that prior to the items being created.
Hopefully this article is helpful to someone. It will certainly help me (I created it because I added a new conference room yesterday and had to re-learn all the steps) if our environment changes again. If you use these steps and run into trouble, please let me know so that I can improve how they are communicated.